Little Green Tomatoes

Tiny Seeds of Goodness


1 Comment

Cast Iron Cooking – Chicken Enchilada Pie

IMG_20190529_190320645

This is a delicious, simple dinner pie that can easily be cooked on a propane, charcoal, or wood burning grill, or in a conventional oven. Leftovers taste just as good warmed up the next day!

It’s a hot July day here in North Carolina, and I like the fact that I can keep the heat out of my kitchen by using a rotisserie chicken from the grocer’s deli & baking this dinner pie outdoors in our propane grill!

Chicken Enchilada Pie 

  • 2 Tbsp canola oil
  • 1 medium sweet onion, diced
  • 3 garlic cloves, minced
  • 1 can cream of chicken soup (10 ½ oz.)
  • 8 oz. sour cream
  • 3/4 cup chicken stock or chicken broth
  • 1 envelope reduced sodium taco seasoning mix (1 oz.)
  • 14 oz. frozen or canned corn (drained)
  • 14 oz. canned black beans, drained & rinsed (optional)
  • 6 cups shredded cooked chicken (rotisserie chicken from the grocer’s deli works great)
  • 1 cup (8 oz.) shredded cheddar cheese
  • 1 cup (8 oz.) shredded pepper jack or Italian blend cheese (your preference)
  • 2 refrigerated pie crusts, brought to room temperature
  1. Bring the refrigerated pie crusts to room temperature, per the instructions on the manufacturer’s packaging.
  2. Lightly grease a 10.5-inch cast iron skillet with Crisco or a small amount of canola oil. Set aside.  If you will be baking the pie in a conventional oven, preheat the oven to 400 degrees.
  3. Dice the onion. Mince the garlic. Shred the chicken and set aside.
  4. Prepare the pie filling on the stovetop. In a separate large skillet, heat 2 Tbsp of canola oil and sauté the onion over medium heat until tender. Add garlic and sauté for 1 minute, stirring constantly. Stir in cream of chicken soup, sour cream, chicken stock or broth, taco seasoning, corn, black beans, and shredded chicken. Remove from heat.
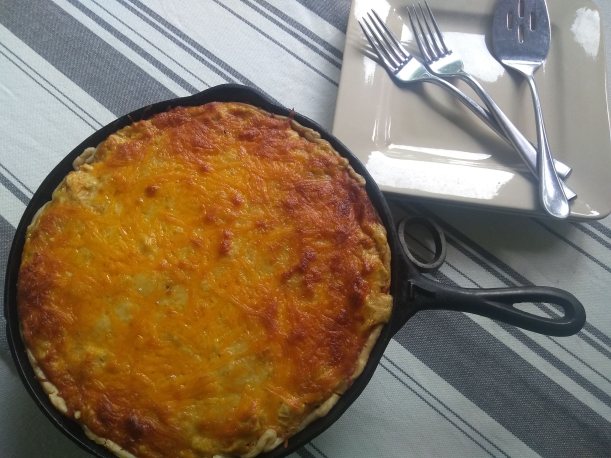
  5. Unroll and press one room-temperature pie crust into the bottom and sides of the greased cast iron skillet. Spread one half of the pie filling onto the crust. Sprinkle ½ cup of each of the shredded cheeses on top of the filling.  Unroll and place the #2 pie crust on top of the mixture.  Layer on the remaining filling, and sprinkle with the remaining shredded cheeses.
  6. Bake at 400 – 425 degrees Fahrenheit for about 35 – 45 minutes, or until pie crust edge is golden brown and cheese is bubbly and lightly browned on top.
  7. Remove from heat and let cool for about 15 minutes before serving.

Note: When I bake in our propane grill, I place the cast iron skillet on top of a pizza baking stone that is made specifically for grilling. The stone absorbs & diffuses the direct heat from the grill flames, preventing the contents of the skillet from scorching on the bottom, while giving an even heat to the cast iron.

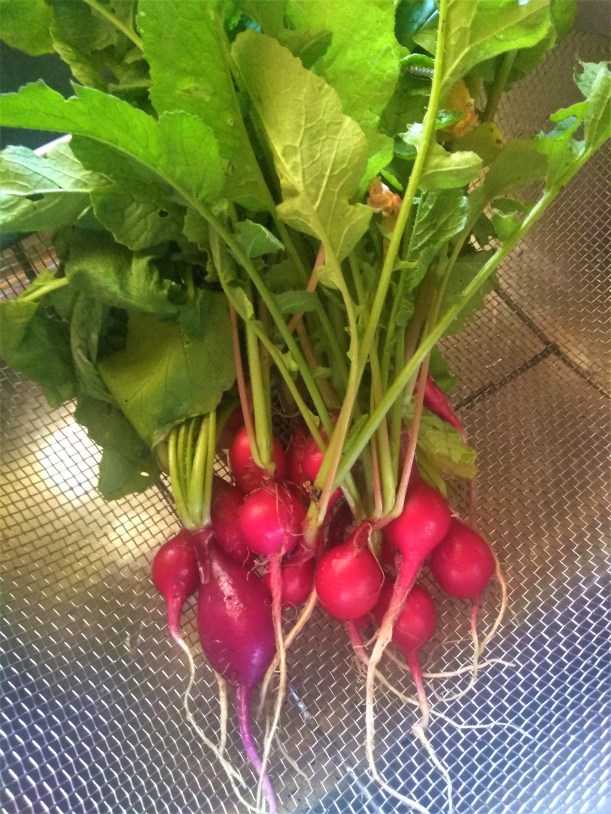
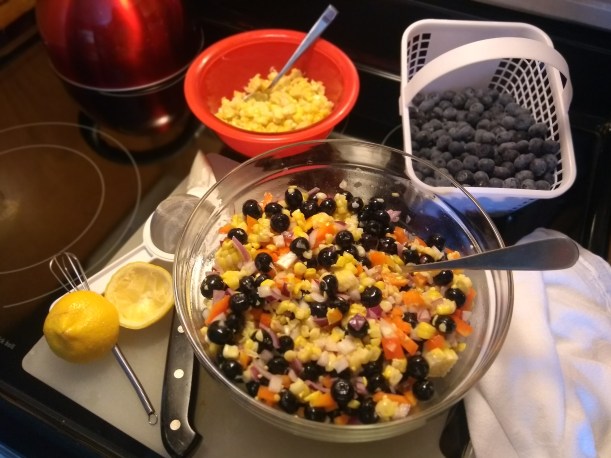
Serve with a side salad of baby greens, slivered radish & slivered sweet onion, drizzled with a light citrusy vinaigrette for a deliciously simple summer evening meal.  My favorite beverage to bring it all together? A fresh-mixed margarita on the rocks!

Makes 6 to 8 servings.  Approximately 1.5 hours to prepare – 30 minutes to prep, about an hour cooking & cooling time.


Leave a comment

Radishes!

IMG_20190527_132229510

On a whim, in late April, I sowed half a packet of six-year-old radish seeds.  Only a couple of short rows in a raised trough style planter. The packet had been languishing in a basket in the basement, along with many other packets of old seed……seeds purchased with good intentions of getting serious about establishing a viable kitchen garden, but for a variety of reasons never quite getting it accomplished.

I was surprised when many tiny green sprouts began to emerge from the soil! Not only did they grow quickly, but they grew thickly! Expecting a poor germination rate, due to the age of the seed, I had sowed more densely than recommended on the seed packet.  Then, seeing their desire to GROW! – once released from their long slumber and feeling the warm soil between their toes – I just couldn’t bring myself to pluck and thin those tiny green bits of life, as was recommended on the seed packet.  So…….I’ve been enjoying small harvests of small mild radishes for about 30 days now.  (I have since learned that the young seedlings can be enjoyed  – roots, sprouts, and leaves – in salads or as a bit of peppery crunch minced on top of crème cheese crostini.  I’ll be plucking and thinning my autumn sowing in hopes of harvesting more fully developed ruby red radishes.  And, likewise, delighting in experimenting with ways to enjoy the taste and nutritional benefits of the “pluckings”!)

Having been raised up in a family of raw radish eaters, there was never the need to explore other ways to prepare them.  My taste and tolerance for raw radish has diminished and so I’ve been experimenting with some new ways to enjoy their peppery goodness.  Two of my favorites so far:

Pan Roasted Radishes and New Red Potatoes

Ingredients:

  • Radishes, tops and tails removed, halved lengthwise
  • New red potatoes, skins on, halved or quartered
  • Fresh thyme sprigs
  • Garlic – 1 or 2 cloves, smashed, skin removed
  • Butter
  • Kosher salt
  • Extra virgin olive oil

Toss radishes and potatoes in a lightly oiled, pre-heated cast iron skillet over medium-high heat for about 2 minutes.  Lower heat to medium-low, continue to cook for about 6 – 10 minutes, until radishes and potatoes are just slightly charred & fork-tender, stirring or tumbling occasionally. Add butter, fresh thyme sprigs, and smashed garlic – all to your taste.  Increase heat to medium-high again, stirring often, allowing garlic to slightly toast.  Remove garlic and thyme stems, season with salt, and serve.

Sauteed Cabbage, Radish & Sausage with Gorgonzola

Ingredients:

  • Savoy cabbage, ½ medium sized head, chopped
  • Radishes, medium sized bunch, tops & tails removed, halved lengthwise
  • Cooked sausage, 1 or 2 links, sliced (Andouille, Bratwurst, Smoked Sausage, Kielbasa – any type of flavorful sausage that you prefer)
  • Extra virgin olive oil
  • Sea Salt
  • Fresh ground pepper
  • Gorgonzola cheese – crumbled

Generously coat bottom of skillet with olive oil and heat over medium heat. Add cabbage, radish, and sausage slices. Saute, stirring or tossing frequently, until cabbage and radishes are tender.  Sprinkle with salt and pepper, stir, remove from heat. Top individual servings with crumbled Gorgonzola and serve warm. Delicious as a left-over meal or side dish – warm or cold.  Reserve and refrigerate extra gorgonzola in a separate container from the other ingredients.  Add gorgonzola to left-overs just before serving/eating for best flavor and texture.

IMG_20190605_134026432


Leave a comment

Sausage, Kale, and Orzo Soup

img_20190115_155841568

In the spirit of my focus on “Souping through January”, here’s a tasty recipe.  This soup is rich with winter vegetables, seasoned sausage, and lovely orzo, all swirling around in a delicious fresh-made poultry broth. The aroma speaks to home and hearth, and there is nothing quite like a warm bowl of delicious soup, crusty artisan bread, and a Belgian beer enjoyed on a chilly January evening.

Sausage, Kale, and Orzo Soup

  • ½ pound ground Sweet Italian Sausage or Chorizo, browned and drained
  • 1 tablespoon extra-virgin olive oil
  • 1 onion, peeled & chopped
  • 1 clove garlic, peeled & minced
  • 3 carrots, peeled and sliced
  • 1 teaspoon kosher salt
  • 1 teaspoon dried oregano
  • 1 teaspoon dried basil
  • ¼ teaspoon dried crushed red pepper
  • ¼ teaspoon ground chipotle
  • 1 teaspoon ground celery seed
  • 4 cups homemade poultry stock (see my Use What Ya Got Stock recipe via link)
  • 2 cups filtered water
  • ¾ cup uncooked orzo
  • 4 cups kale, rinsed, coarsely chopped, & drained
  • Fresh squeezed lemon juice, to taste
  • Shredded Parmesan, Asiago, or Romano cheese

Toss carrots, onion, and garlic with the olive oil in a heavy soup pot or dutch oven, and cook, uncovered, over medium heat, stirring frequently, until onion is tender, about 5 minutes. Some light browning adds flavor, but watch closely so that garlic doesn’t burn. Stir in the browned and drained ground sausage.  Stir in the salt, oregano, basil, crushed red pepper, chipotle, and celery seed. Continue to cook and stir for about a minute. Add the poultry stock, water, and orzo. Turn up the heat, cover, and bring to a boil. Once boiling, reduce heat to low/medium and cook, covered, at a strong simmer until the orzo is tender (about 10 to 12 minutes). Turn off the heat. Stir in the kale. Allow to sit, uncovered, for about 5 minutes.

Ladle in to bowls, top with the shredded cheese and fresh squeezed lemon juice, to taste. A thick slice of warm, crusty artisan bread is a nice accompaniment! And if you have a favorite Belgian style beer, it will pair nicely. Enjoy!

Makes 6 to 8 servings.

img_20190115_170010705


1 Comment

To Juice or To Soup? That is the Question!

img_20190108_132440377

I’ve been contemplating embarking upon a juice fast.  I understand that there are many health benefits associated with juicing. But honestly, I am more of a soup girl. Homemade soup. Made-from-scratch soup. I find the textures, shapes, and colors of soup ingredients appealing. This time of year, a bowl or mug of warm soup just makes me happy.  And then there’s that awesome aroma of a pot of soup simmering on the stove.  Mmmmm. Need I say more?

I’m scrapping the juicing, and going for souping!

As part of my continuing efforts to further reduce the amount of processed and containerized foods in my diet, not to mention the sodium contained in both, I decided to try my hand at homemade stock.  Again.  I’ve made a few batches over the years, but never stuck with it, mostly because of time constraints and the fact that good stock needs to simmer for several hours on the stove top.  Back around Thanksgiving, with a turkey carcass looking pitiful in the roasting pan, I wondered if I could use my large slow-cooker to make some stock.  I googled “stock in slow cooker”, or something like that, and guess what?  Many, many other people have had the slow cooker idea long before it floated into my mind! Go figure.

I read through a bunch of recipes on-line and perused the stock information in my Joy of Cooking cookbook.  And then I decided that even if I hadn’t invented the idea of making stock in a slow cooker, that didn’t mean I couldn’t invent my own recipe!  Sometimes I just get in the mood to not play by the rules, and I guess I was in one of those moods, because I decided to name my recipe “Use What Ya Got Stock”.  I did (use what I had on hand), and the turkey stock was delicious.  I’ve made two batches of chicken stock since (using what I had on hand), and both times it was equally delicious. Using my own stock has taken my soup game to the next level.  I highly recommend it.  Here’s a basic list of ingredients I’ve used, and the process that worked well for me. Try it – I think you might  like it!

“Use What Ya Got Stock” – Slow Cooker Recipe 

  • 1 cooked turkey or chicken carcass – bones, skin, & cartilage with most of the meat removed (deli-rotisserie chicken carcass works nicely). Cooked down drippings and bits from the roasting pan can be used as well, unless they are super greasy.
  • Raw aromatic vegetables, cut in to large chunks. Remove peel or skin.  I usually have carrots, celery, onion, and garlic on hand, and I use all of them.  I use 1 onion, 2 or 3 cloves of garlic, 3 carrots, and 3 ribs of celery.  Adjust amounts according to the size of your slow cooker crock.
  • Fresh rosemary – 3 to 5 sprigs.
  • Bay leaves – 5 to 7 leaves.
  • Whole black peppercorns – about 10.
  • Dried tarragon – about a teaspoon.
  • Chili powder – about a teaspoon.
  • Cayenne pepper – about a half teaspoon.
  • Kosher or Sea Salt – about a teaspoon.
  • I had small amounts of some herb mixes that were past their prime in my spice cabinet, so I tossed what was left of them in to the crock as well.
  • Filtered water

Place the poultry bones, skin, etc. in the slow cooker crock. Distribute the vegetables, herbs, and spices in and around the poultry parts. Add filtered water to cover all ingredients and fill the slow cooker crock to about an inch from the top.  Place the lid on the cooker, and cook on high for 1 to 2 hours, then reduce temp to low and cook overnight – about 8 to 10 hours in total.

When done cooking, remove bones and what is left of the vegetables & undissolved herbs with a large slotted spoon and allow to drain in a colander placed over a large bowl or soup pot. After the liquid is finished draining from the colander, remove and discard the solid contents of the colander.  Add the remaining liquid stock from the slow cooker to the liquid in the bowl or soup pot, and allow to cool for about 30 minutes.

Place the cooled stock in the refrigerator – in glass container(s) – do not use metal containers, cover, and leave overnight.  The next day, the fat will have risen to the top and solidified, and can be skimmed off with a spoon and discarded.  The stock itself may be gelatinous (jelly like), and this is due to the collagen that has been extracted from the cooked bones. Collagen is not fat, and is a big part of what makes homemade stock so healthy and delicious. Pour or spoon the stock in to storage containers for refrigerating or freezing.

I store stock in 16 oz mason jars with plastic screw top lids in the refrigerator for 1 to 2 weeks.  I’ll typically use 32 oz (4 cups) of stock in most of my soups, so I’ve been keeping two mason jars to refrigerate for use in the short term.  Any left-over amount of stock is placed in freezer safe containers for use at a later date.


Leave a comment

Little Bits of Goodness – December 9

Pull up close by the fire my friends,

I’ll pour ye a cup o’ cider!

We’ll talk and we’ll laugh, we’ll toast, my friends,

Wassail – Waes Hael – Be Well, Good Health!

And Blessings to the Trees!

Wassail!  Lift ye cup o’ cider!

IMG_20181209_152458658.jpg

Wassail , from Old English waes hael, is a beverage made of fruit juices, most commonly apple juice or cider, and spices, slowly heated and served warm.  The Old English waes hael means “be healthy”.  The ancient tradition of “wassailing” included singing, toasting, and drinking the beverage – to the health of the villagers and to the health of the apple trees, blessing the trees in the hopes of bountiful harvests to come.  I like the idea of acknowledging and showing appreciation for the bounty that Gaia provides! For without that bounty, where would we be?

Holiday Wassail

  • 48 ounces apple juice
  • 48 ounces cranberry juice
  • 4 cinnamon sticks
  • 1 tablespoon whole cloves
  • ¾ cup brown sugar

Place cloves in a mesh tea basket.  Add apple and cranberry juice to a large saucepan. Dissolve brown sugar in the juices.  Simmer until hot over low heat with cinnamon sticks and clove basket. If you need to keep the wassail warm for an extended perior of time, transfer to pre-warmed slow cooker, low setting.

Serve in glass mugs and garnish with a fresh cinnamon stick & orange wheel.

Wassail can be stored in refrigerator for up to one week. Remove and discard cinnamon sticks and cloves prior to storing in refrigerator.

P.S. The house will smell like heaven!  This is a great beverage to serve for a holiday open house – your guests will be greeted with the delicious yuletide aroma upon arrival!


1 Comment

Little Bits of Goodness – December 7

Be kind whenever possible

It is always possible

– Dalai Lama –

IMG_0381 (2)

 Don’t forget you-know-who when you’re doing your holiday baking! Woof!

Peanut Butter Pup Cookies

  • 2 cups whole wheat flour
  • 1 cup oatmeal, plain, uncooked
  • ½ cup powdered buttermilk
  • ½ tsp salt
  • 1 cup natural peanut butter – with oil well incorporated (be careful NOT to use peanut butter that’s sweetened with xylitol – xylitol is toxic to dogs)
  • ¼ cup honey
  • 2 large eggs
  • ½ cup water

Combine dry ingredients in a large bowl. Add peanut butter, honey, and eggs. Beat on low until well combined. Gradually add water, beating until dough holds together.

Place dough on large sheet of parchment paper & cover with a second large sheet of parchment paper.  Using a rolling pin, roll out until dough is about ½ thick.  Slide parchment with dough on to a large cookie sheet and chill in refrigerator for 1 hour.

Remove dough from refrigerator, remove top parchment.  Preheat oven to 300 degrees Fahrenheit. Using a bone shaped cookie cutter (or any fun shape(s) of your choice), cut out cookies and place on a  parchment-lined baking sheet.  You can also use a cap from a soda or water bottle to make small rounds. Gather up extra dough pieces and roll out again or roll into small balls and flatten with your thumb. Use up all that luscious dough!

Bake 1 hour. Cool on rack.  Recipe makes about 20 bone-shaped cookies, 3” long.

Cheese Please Doggie Snacks 

  • 1 cup oatmeal, plain, uncooked
  • ¼ cup vegetable oil
  • 1 ½ cups hot chicken broth, low sodium or no-salt
  • ½ cup powdered buttermilk
  • 1 cup (4 oz.) grated cheddar cheese
  • ¼ teaspoon salt
  • 1 egg, beaten
  • 1 cup cornmeal
  • 1 cup wheat germ
  • 3 cups whole wheat flour

Combine oatmeal, oil, and water (or hot broth) in a large mixing bowl.  Let stand 5 minutes. Stir in powdered buttermilk, grated cheese, salt & egg. Add cornmeal and wheat germ. Mix well.  Add flour, about a half a cup at a time, incorporating well each time. After all the flour is incorporated, knead 3 to 4 minutes to make a very stiff dough.

Preheat oven to 300 degrees Fahrenheit.

Roll out dough to about ½ inch thickness. Using a bone shaped cookie cutter (or any other shape(s) of your choice), cut out snacks, placing on lightly greased cookie sheet. You can also use a cap from a soda or water bottle to make small rounds. Gather up extra dough pieces and roll out again or roll into small balls and flatten with your thumb. Use up all that luscious dough!

Bake for 1 hour at 300 degrees. Turn off heat and leave the snacks in the oven for 1 hour or longer.  Recipe makes about 2 pounds of snacks.


3 Comments

Pasta Inspiration

I was inspired yesterday.  Inspired to prepare and consume wholesome, simple, delicious food! After watching the first episode of Samin Nosrat’s Netflix series, Salt Fat Acid Heat , I rummaged through my frig and pantry to see if I had the necessary ingredients for one of my favorite pasta dishes.

Although not the incredible aged Parmigiano-Reggiano from Italy that Samin featured on her show, I had shredded Parmesan in a plastic pouch from the grocery store.  High class all the way, baby!! Although not fresh handmade pasta – also featured on the show, I had a box of average, run of the mill fettuccine in my pantry. I did have a nice fresh bottle of Italian Carapelli Oro Verde EVOO. And a can of California ripe olives. The stars were aligned!  The pasta prep could begin!

I have been making this dish for eons.  Well, since the early ‘90s actually, which, most days, seems like eons ago.  I used to follow the recipe to a T. Now I am lazy and tend to avoid / combine a couple of the steps.  Main reason – I absolutely abhor peeling and seeding tomatoes, and will do just about anything to avoid that task.  Besides, I like the skins and the seeds – they add flavor and texture.  So, for correctness sake, I’ve included the recipe in its original form.  If you choose to make the dish, you can make the call on how you want to handle the tomatoes.  I do not peel nor seed my tomatoes, I simple cut them into large chunks and cook them along with the peppers and garlic.  I will tell you that I have used fresh heirloom tomatoes, cherry/grape tomatoes, even canned tomatoes, and have been pleased with each.  Yesterday I used a package of Wild Wonders Gourmet Medley , and I love the variety of colors and flavors they brought to the dish.

IMG_20181016_185922591

Pasta with Broccoli and Tomatoes

  • 1 lb fresh broccoli
  • Salt, to taste
  • 2 large ripe tomatoes
  • 1 large sweet red paper, cut into chunks
  • ½ lb spaghetti, fettuccini, or penne pasta
  • ¼ cup extra virgin olive oil
  • 2 large garlic cloves, finely chopped
  • ½ teaspoon red pepper flakes
  • 1 can ripe olives, pitted and sliced
  • ½ cup coarsely chopped Italian parsley
  • Freshly ground black pepper
  • Freshly grated Romano or Parmesan cheese

Cut broccoli into small florets with about an inch of stem. Peel the remaining stems and dice into small pieces.

Bring a large pot of water to a boil.  Add salt and submerge tomatoes for about 10-20 seconds. Remove. Peel and seed tomatoes; cut in to large pieces.

Add broccoli to boiling water and cook 3-4 minutes, until just tender.  Remove and plunge into a bowl of ice water to stop cooking and to retain the bright green color.  Drain and set aside.  (Note: in my current lazy state, I eliminate this step and simply drop the broccoli in to cook with the pasta about 5 minutes before the pasta will be al dente).

Add a few drops of olive oil to the boiling water, drop in the pasta, and stir.

While pasta is cooking, warm olive oil in a skillet with garlic and red pepper flakes.  When hot, add tomatoes and sweet red pepper chunks.  Cook for several minutes over low to medium heat.

When pasta is just about done, return the broccoli to the water to warm, then pour pasta and broccoli into a colander.  Transfer to a large warm serving bowl. Add the tomato mixture, black olives, parsley, black pepper and toss.

Serve with plenty of freshly grated Romano or Parmesan cheese and crusty Italian bread.

Generously serves 2 to 3 hungry folks. Cibo delizioso!!


Leave a comment

October Beans (in September)

My Grandma called them “Shellie Beans”. The farm stand at Smith Farms calls them “October Beans”.  The North Carolina Folklife Institute says that these beans, also called “fall beans” or “speckled beans”, are an assortment of old heirloom shell beans that ripen between the end of summer and first frost.  Whatever you choose to call them, these are some Beautiful Beans!

IMG_20180909_142337871

While the Great Depression of the 1930’s was a time of hardship and suffering, my mother would tell me of how blessed her family was at that time. She was continually thankful that she grew up in a farm family.  Although times were tough and they had little else, they had their land, their home, and they were able to grow and produce their own food. She had fond memories of the simple meals that sustained her large family during those lean years.  She continued to prepare her favorites, even in times of plenty, throughout her adult life.

One of those beloved stand-by meals was soup beans and cornbread. I vividly recall coming home to the mouth-watering aroma of a pot of soup beans simmering on the stove and cornbread, fresh baked, and straight out of the oven.

Over the years, I’ve tinkered around with Mom’s basic recipe, changing it up a little bit, adding some ingredients.  Mostly I eyeball and adjust quantities to taste, but this time I recorded my measurements.  So, here’s my version.

Delicious! Simple! Beautiful Beans! 

  • 4 cups beans, removed from pods, rinsed in cold water & drained
  • 6 cups cold water
  • 4 slices thick cut uncured bacon
  • 1 teaspoon bacon drippings
  • 1 large Vidalia onion, coarsely chopped
  • 2 cloves garlic, minced
  • 1 tablespoon Better Than Bouillon chicken soup base
  • ¼ cup organic raw sugar
  • 1 tablespoon Worcestershire sauce
  • ½ cup to 1 cup ketchup, depending on your taste

Place rinsed and drained beans in a large soup pot with 6 cups cold water.  Bring to a full boil.  Reduce heat to medium, boil for about 5 minutes, mostly covered (leave lid a bit askew to prevent boiling over).

Cut the bacon into chunks and fry until crisp.  Remove from pan and drain, reserving 1 teaspoon of the bacon drippings.

To the pot of boiling beans, add the bacon, bacon drippings, onion, garlic, chicken soup base, sugar, Worcestershire sauce, and ½ cup ketchup.  Stir well, and return to a full boil.  Once boiling, reduce heat to low, and cook, covered, until beans are to desired tenderness – about 2 hours.

You may need to add a cup or two of additional water as the soup cooks, depending on the amount of broth you prefer.  If you add additional water, you can add additional ketchup as well.

Serve steaming hot with fresh baked cornbread or sweet corn tomalito (sweet cornbread pudding).

Any kind of dried beans can be used in this dish as well.  Great Northerns, Pintos, Field Peas – all are very good.  If you’re using dried beans, you will need to rinse, sort, and soak overnight, according to the instructions on the bag, prior to preparing this recipe.  Or, you can use the Quick Soak method if you’re short on time.

Makes 4 – 6 servings.

Sweet Corn Tomalito 

  • 5 tablespoons salted butter, softened
  • ¼ cup masa harina
  • ½ cup organic raw sugar
  • 2 cups whole kernel corn – fresh, frozen (thawed), or canned
  • ¾ cup milk
  • ½ cup cornmeal
  • 1 teaspoon baking powder
  • ½ teaspoon sea salt

Fill bottom pan of a double boiler with water and bring to a boil.  If you don’t have a double boiler, you can use a large soup pot or Dutch oven and a glass baking dish to accomplish the same thing.  See my post on The Great Cobbler Experiment for more information.

In a medium mixing bowl, combine the softened butter, masa harina, and sugar until light and fluffy.  In a food processer or a blender, blend 1 cup of the corn with the milk and cornmeal until smooth. Add to the masa mixture and stir. Add the remaining cup of corn, baking powder, and sea salt.  Combine well and stir until batter is smooth.

Pour batter into top pan of double boiler.  Cover tightly, either with the double boiler lid, or aluminum foil.  Lower heat and steam over simmering water for about 50 to 60 minutes, or until firm. Check water occasionally and add more if needed, to prevent bottom pan from boiling dry.

Serve warm, on a warmed plate or small side dish, by the scoopful.  A small dollop of sour cream on top is tasty as well!

Makes 6 – 8 servings.


2 Comments

The Great Cobbler Experiment

IMG_20180813_112512241

So, it is cobbler season, and my oven is currently not functional! Sadness. It over heated some time back and I haven’t moved forward with getting a repair service to come and look at it. My “spidey senses”, intuition, or just plain procrastination have been telling me “wait a little while – don’t get in a rush to fix it”. So I haven’t. But if nothing else has malfunctioned with the range by October – Apple Crisp and Pumpkin Crunch season – you can bet I will be calling the repair guy!

With our collection of about every other piece of cooking equipment known to man (and woman), we have not been going hungry, trust me. About the only thing I haven’t been able to make so far is home-made pizzas.  The “complaint department” has officially stopped taking any further complaints on that issue.

Being that I am frugal, a “DIY-er”, and always aspiring to be more self-sufficient, I decided that there has to be more than one way to make the fruit cobblers I love.  Thus, the decision to experiment was made.  I should add that I inherited all of the above from parents who grew up during the Great Depression in Midwest farm country. Grandparents who always grew, prepared, and shared all sorts of deliciousness may have also contributed to a few of my inherited traits.

First experiment: Peach cobbler.  Cooked on very low heat, stovetop, in heavy enameled cast iron dutch oven. As feared, the cobbler dough on the bottom scorched. The un-burned upper layers were scooped out, consumed, and very tasty.  More ooey & gooey than a baked cobbler, but I happen to like ooey & gooey.

Second experiment: Peach cobbler.  Steamed in DIY double boiler.  As luck would have it, my Pyrex pie plate nestled perfectly on to the rim of my stainless steel soup pot.  And the lid for the soup pot fit perfectly atop the pie plate! Cobbler was steamed for approximately 1 hr. & 15 min. over gently boiling water.  The beginning level of the boiling water was just below the bottom of the pie plate.

Note to self – use less butter than recipe calls out for a baked cobbler! No burning experienced with this method, and my taste tests received an “mmmmm…..yummy” rating. Again, more ooey & gooey than a baked cobbler. Maybe somewhat more of a consistency of an old-fashioned fruit pudding? I packed this experiment up and sent it along to the office with my husband.  His co-workers gave it a thumbs up and the pie plate came back scraped clean.

Third experiment: Blueberry cobbler. Steamed in same DIY double boiler.  Reduced butter by ½ the amount called out in recipe.  It’s ooey and it’s gooey – and I’m not sharing this one!!

IMG_20180728_154130827

Here is my favorite cobbler recipe. So simple and so delicious! I use an air-bake cake pan when I bake in the oven, to prevent any scorching of the bottom crust or fruit sugars.

Fresh Fruit Cobbler

  • 1 tablespoon + 6 tablespoons salted butter
  • 2 large eggs
  • 1-1/4 cups all-purpose flour
  • 1-1/4 cups + 2 tablespoons sugar
  • 4 cups fresh fruit of your choice (my favorites are blackberry, peach, or blueberry)
  • 1 tablespoon fresh lemon juice
  • Vanilla ice cream or whipped cream (optional)

Preheat oven to 375 degrees.

Grease an 8” x 8” pan with 1 tablespoon of butter.  In a separate bowl, combine the egg, flour, and 1-1/4 cups of sugar until the mixture resembles coarse meal. Add ¼ cup of the flour mixture to the bottom of the pan.  Pour in the fruit and sprinkle the lemon juice on top. Spread the remaining flour mixture evenly over the fruit. Melt 6 tablespoons of butter and drizzle evenly over flour mixture. Sprinkle 2 tablespoons of sugar on top.

Bake for 40 minutes, or until crust is golden brown.  Let sit for 10 minutes before serving.

Serve in individual dessert dishes and top with vanilla ice cream or whipped cream (optional).

Yield: 6 – 8 servings.


Leave a comment

FRESH Extravaganza!


I am blessed to live where fresh fruits, vegetables, and flowers are grown locally and readily available. This is blueberry, blackberry, and peach season in North Carolina, and for me, there is nothing quite like fresh picked berries and peaches.  Early in the morning, about every week or two during mid-summer, I treat myself to a 20-minute drive through lovely North Carolina countryside to Blueberry Thrill Farm.  If I can beat the heat, berry picking is a joy.  Seeing families and friends enjoying their time together and hearing the kids announcing their conquest of the “Biggest One EVER!” or “Dad, you’re not gonna believe how many berries I just picked” makes me smile.  Women chat about what they will make when they get home – cobblers, pies, salads, cakes, ice cream – old family recipes or something new they want to try.  Dads and grand-dads hold the kids up to reach the high ones, and help to referee contests between siblings.  Honestly, it’s a slice of Americana, a great learning experience for young and old alike, and generally a very pleasant way to spend a couple of hours on a summer morning.  I think it’s the berries and the flowers – I think they make people happy!

IMG_20180727_153429339

Blueberries have been folded in to pancakes for Sunday brunch, sprinkled on sweet kale salads, and combined with sweet corn in a delightful summer salad.  I’ll be freezing some from this picking.  And I think I have enough left for a cobbler!

I made cinnamon applesauce from the summer apples – some for enjoying now and some is in the freezer waiting to brighten a winter day!

IMG_20180718_140817496

And the flowers, oh the flowers!  Beautiful! Zinnias, Ageratum, Cosmos, Globe Amaranth, Lemon Balm.  Picked a 5-gallon bucket full and arranged some Mason jar bouquets for the kind vet clinic staff who take such good care of our canine kids (and us too).  We appreciate them!

So, here are a couple of my favorite fresh blueberry recipes.  I’ll be sharing some more in future posts.

IMG_20180621_100727525_PORTRAIT.jpg

Blueberry and Sweet Corn Salad

  • 3 cups fresh blueberries
  • 2 cups fresh sweet corn, cooked and cut off the cob
  • 1 small red onion, chopped
  • 1 orange or red bell pepper

Dressing:

  • 3 tablespoons apple cider vinegar
  • 2 teaspoons fresh lime or lemon juice – your preference
  • 2 teaspoons sugar
  • 1 teaspoon salt
  • 3 tablespoons canola oil

Mix all dressing ingredients in a bowl, except for oil, and whisk until sugar is dissolved.  Slowly add canola oil and continue to whisk until dressing thickens.  Set aside.

In a separate bowl, combine blueberries, corn, pepper, & onion.  Add dressing and toss gently.  Cover and chill for at least 1 hour.

Makes a great light side dish to grilled chicken or pork chops. Or, enjoy on a bed of fresh salad greens or as a salsa with salty tortilla chips.

Makes 4 – 6 servings.


Blueberry Coffee Cake

Pecan Topping:

  • ½ cup butter
  • ¼ cup sugar
  • 1 cup flour
  • 1 tablespoon grated lemon peel
  • 1 cup chopped pecans

Batter:

  • 1 cup butter
  • 1 cup sugar
  • 1 ¾ cups flour
  • 2 teaspoons baking powder
  • 2 teaspoons grated lemon peel
  • ¼ teaspoon salt
  • 4 eggs
  • 1 pint fresh blueberries (or frozen) – rinsed, drained, and patted dry.

Prepare topping. In small saucepan over low heat, melt butter.  Remove from heat and stir in flour, pecans, sugar and lemon peel to form a soft dough.  Set aside.

Preheat oven to 325 degrees. Grease and flour a 9”x13” baking pan.

Prepare batter. Cream butter and sugar. Reduce speed to low, add flour, baking powder, lemon peel, salt and eggs. Increase speed, beat until smooth and creamy. Smooth evenly in to greased baking pan.  Top with blueberries and crumbled pecan topping. Bake 45 minutes or until golden. Lovely when served warm.  Serves 16.